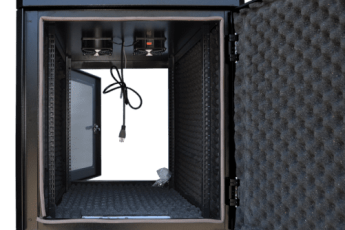
To make a soundproof booth, you can use a variety of materials. These include Reflection Filters, Soundproof paint, window coverings, and a sound absorbing blanket. The doors of soundproof booths should have sweeps, which ensure no sound gets through them when closed.
Reflection Filters
Reflection filters help improve the quality of your voice by blocking out unwanted reflections. Reflections are a common problem with less expensive microphones and reflection filters improve this problem. A good reflection filter is an investment in your microphone’s sound quality and can save you money in the long run.
Reflection filters also help you keep the sound quality of your vocal recordings clean. This is because they absorb sound around the microphone. This allows you to focus more of your mic’s energy on the vocalist, which means less background noise. In addition, a reflection filter keeps most of the bass waves out.
Reflection filters are available in different shapes and sizes. Some are designed for smaller spaces while others are for larger spaces. For example, the Aston Microphones Halo Shadow is an ideal solution for a larger recording space. It also features a rear slot to accommodate boom stands.
Reflection filters are available in different materials and can be purchased separately or in kits. The price of these filters ranges from $50 to $400. They are easy to use and store. You can also construct DIY booths from PVC piping and wooden crates. However, you must be aware of the fact that these DIY solutions aren’t always the most effective solution for soundproofing your vocal booth.
Reflection filters are not a magic bullet, but they can improve sound quality. They aren’t a guarantee, but they’re a good place to start if you’re unsure about the results. If they don’t work for you, try some other methods.
Soundproof paint
Soundproof paint is a heavy-bodied water-based paint that absorbs sound. It contains ceramic microspheres and sound-absorbing fillers, such as thermacels. These are tiny, vacuum-sealed cells filled with soft pigment. When sound waves strike the paint, the soft pigment wobbles and absorbs the energy. This makes the room quieter and reduces echo.
Soundproof paints are best applied using an airless sprayer with a 317 tip at 1,800 to 2,400 psi. After use, the sprayer must be cleaned with soap and water. The method of applying soundproof paint does not affect the material’s dampening ability. Soundproof paints are usually applied in two-coat processes. This process provides excellent consistency and a high level of sound-deadening efficiency.
You can also use fiberglass acoustic panels. These are much cheaper than foam, but they do not absorb as much sound. You can start by measuring the space you want to use for your soundproof booth and sketching out the design. Once you have a rough idea of how your booth should look, you can begin construction.
Soundproof paint can be a great alternative to traditional soundproofing materials. While acoustic wall panels and ceiling tiles are more expensive, soundproof paint is an affordable and effective solution. The downside of soundproofing paint is that it only addresses mid-range frequencies, not high-frequency noises. Therefore, you should only use it in conjunction with other methods of soundproofing to get the best results.
Soundproof window
There are a few ways to make a soundproof booth window. The first method involves installing a door with a hinged window. This can be made of PVC pipes, but you should be careful not to screw anything into the pipes. This may compromise the structure of your soundproof booth. You can also use grommeted soundproof blankets or curtains, which will help keep the sound out.
Another effective method is to use double-paned glass. This option is effective, but it will require you to have some special woodworking skills. Using angled spacers, the glass panels will dampen sound. If you don’t feel confident with your woodworking skills, you can also use rubber gaskets.
Next, determine the purpose of your soundproof booth. It should be big enough for your home recording needs. It should also be in a room that has no external walls. If you’re recording live music, you might consider using a microphone shield. These microphone shields have the added advantage of improving the quality of your recordings.

Soundproofing a home recording studio is a never-ending battle between noise cancellation and noise creation. Even the best soundproofing techniques will leave some noise outside, which sensitive equipment will pick up. But if you use soundproof windows, you’ll be able to stop noise from entering the room.
Sound-absorbing blanket
A sound-absorbing blanket is one of the best ways to make your studio soundproof. These blankets can help to cut down on noise from live concerts or even from blaring music in your home. While they do not completely block out noise, they can help to minimize reverberation and increase speech intelligibility. You can hang them from the ceiling or mount them on the wall.
There are many types of sound-absorbing blankets available on the market, including those made of polyester and quilted cotton. The blankets with grommets allow for easy installation. The thickness of the blankets helps them to absorb sound. However, some are very heavy and cannot be hung on a hard surface.
Sound-absorbing blankets are available in a wide range of prices. The more expensive versions are made of high-quality materials. For example, a high-quality sound-absorbing blanket may be made from fiberglass, one of the best materials for sound absorption. A good sound-absorbing blanket will weigh quite a bit and be thicker than your typical blanket.
Sound-absorbing blankets are a good choice if you’re trying to reduce the amount of echo in your vocal booth. Not only can they eliminate echoes, but they also help control other noises, such as drums and other percussion. The blankets can also double as light reflective boards. When using a key light, you can shine it on the white side of the blanket. This will make the light more diffused and reduce the need for fill light.
Acoustic sound-absorbing blankets can be purchased from many online stores. Amazon sells a wide variety of sound-absorbing blankets. You can also search for acoustic blankets by using the keyword “acoustic blanket.” These sound-absorbing blankets are made of recycled materials and have an NRC rating of 0.85.
Keeping the voice front and center
When making a soundproof booth, remember that the voice is the most important part of the mix. This means you want to make sure it is the focal point, and the music shouldn’t overpower it. This will ensure a better recording and listening experience. Whether you are a professional musician or a hobbyist, a DIY sound booth can be an essential piece of studio equipment. For example, it’s a useful tool for social media presenters, bloggers, and other people who record audio-video clips. The process of building a soundproof booth is simple and affordable, and you can easily make one.

Soundproof booths should be made of thick mattresses or other materials to absorb sound. These are usually cheap and portable. You can also use them to make a vocal booth. Soundproof booths can cost anywhere from $50 to $400. They’re usually made of foam and mounted on a microphone stand, making them easy to assemble and store.
Creating a soundproof booth is a good way to avoid disturbing other people. If you are recording music or video, for example, you don’t want other people around to hear the sounds of your performance. You also don’t want to have your recording environment be affected by nearby residences and businesses. Also, soundproofing your studio will prevent any outside noise from leaking into your recording environment. If you’re recording a string quartet or acoustic guitar folk, for example, you don’t want to have trash trucks and leaf blowers roaring by your studio.
When building a soundproof booth, it’s important to consider the frequencies of sound that will be captured. For example, when you record a song, the bass and high-frequency frequencies are more accentuated in a high-end recording, and low-end frequencies are buried within the low-midrange range.
